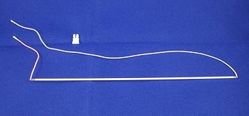
CCFL Lamps with wires Made to Order
Product Description
Scroll down the page for complete ordering instructions. Make sure that the information that you provide is accurate as custom orders are not refundable.
|
HOW IT WORKS |
|
|
Here is an example of what you receive. |
|
 |
Lamp complete with CCFL wire and terminal pins. Connector is also included and can be installed after end caps are put on. |
|
Slide caps off of the old assembly and onto the new assembly. |
|
 |
Use care in removing old caps to avoid tearing silicone material. Carefully slide them over the terminal pins and position them back on the new lamp same as the original. |
|
Snap terminal pins into the new connector |
|
 |
Make sure to position the terminals into the new connector exactly as the original. In most cases the High Voltage (pink wire) plugs into the #1 pin slot on the connector. |
|
READY TO RE-INSTALL |
|
|
HOW TO ORDER |
|||
|
Step #1 |
Carefully measure your CCFL backlight |
||
| It is important to get an accurate measurement of your lamp. CCFL lamps are measured from end of glass to end of glass. For further reference go to How to Measure your CCFL Lamp. |
|
||
|
Step #2 |
Choose your connector style |
||
| Select the connector that suits your needs. Most CCFL backlight assemblies utilize either the 2 or 3pin JST connectors as seen to the right. You can also choose to order your lamp with raw wire. |
 |
 |
|
|
Step #3 |
Measure the wire lengths |
||
| Measure the wire length of both the hot lead (pink) and the return side (white). The return wire will be the longer of the two wires. Add 1/2" or 10mm to overall length to allow for connector and soldering. The wire gauge we use for this item is 28AWG. Please specify whether the measurement you give is in metric or inches. |
|
||
|
Step #4 |
Choose your wire orientation |
||
| Wire Orientation is critical to allow for easy replacement
of your lamp. Pay careful attention to the angle of that the wire is
soldered to the lamp.
|
|
||
For discounted pricing on quantities of over 100 lamps, please visit our wholesale page.
To learn more about our wholesale applications, please visit our corporate site www.plazmo.com
E-mail questions and comments to Email: customerservice@ccflwarehouse.com E-mail wholesale inquiries to Email: sales@ccflwarehouse.com


